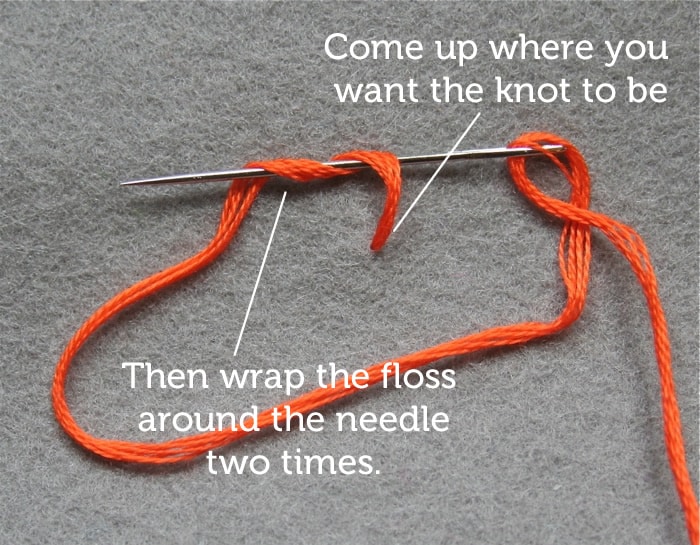
How To: French Knots

I thought I’d publish this quick basic tutorial for French knots. I use them a lot for tiny eyes, noses, flowers, polka dots, etc… so they appear often in my patterns. This is how Larissa Holland does it. You may have a different way? But I find this is a foolproof method for consistent, good-looking, nicely round French knots.
You’ll find a version of this tutorial in the Resource section of my patterns. Keep in mind I was photographing this myself, so I couldn’t have my hand on the needle and the camera button at the same time. I drew in a quick stand-in for my fingers up there.
Some ways you can vary the knot:
- You can make your knot look larger or smaller depending on how many strands of floss you use.
- You can also make the knot look long instead of round by wrapping the floss around the needle more than two times.
- Use lots and lots of knots to completely fill an area with an interesting nobbly texture.
- There’s also a variation of the French knot called ‘colonial knot’, which usually ends up looking a bit larger and rounder than the French version with the same number of strands. You can see it here. I prefer the French knot just because I’m used to it, it’s quicker, and it gives great results.
Once you get the trick of doing them, you’ll realize French knots are not scary at all and maybe even a little fun! They are certainly a great way to add charming texture and details to your embroidery.


This is by far the best picture of how to do this I have ever seen. I have always struggled with french knots to the point where I have unfinished projects. Thank you so much for sharing this!
This is great for me, since I have not perfect this knot al all….Thank you for sharing…Judith, Texas
Thank you! 🙂
Grace, mercy and peace from God our Father and the Lord Jesus….
I realize you're very good at this sort of thing with probably years of instruction and practice, but I'm a newbie; I'd like to have a "textbook", a sort of encyclopedia of stitches handy that I can refer to when I'm stitching on my couch. Can you recommend such a thing: Since I'm REALLY new at this, I'd REALLY like a book that shows, step by step, how to do the stitch and how the stitch looks when it's done.
Thanks for bearing with me.
Matthew Ferszt
Hi, Matthew! Grace and mercy be to you as well. No worries. Actually I've had no instruction. I taught myself with books. I think the very best teacher is practice. I love my old reference book, Reader's Digest Complete Guide to Needlework. I think I found it at a garage sale. They are available online from used book places. It covers the basics plus crazy complex stitches and techniques. You might go to the library and flip through what they have there to see if it will work well. I'm sure any basic needlework book would be fine, and also check out Sublime Stitching's website for great tutorials if the pictures leave you mystified.