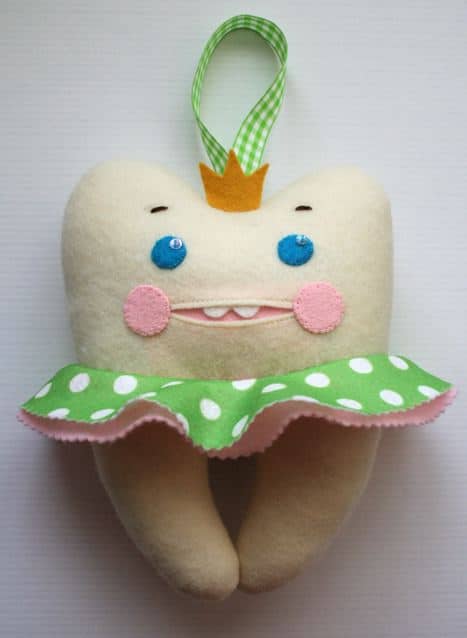
Tooth Pillow Improvement

Hey, everybody! I’ve been to physical therapy and we did all kinds of cool but sinister-sounding things like electrodes and traction. My neck is on the mend, and this Thanksgiving all my thanks go to the good Lord for answered prayers. And to you, for your prayers and good wishes! More PT after Thanksgiving for me, and I’m looking forward to it.
I did squeeze in this tiny bit of crafting for a sweet little five year old’s birthday party. I assure you it was quite moderate compared with the mondo crafting I wanted to do. I thought I’d share it with you since I added an improvement that will make it more durable.

When you make the Tooth Pillow from my pattern, after you mark the line for the mouth but before you cut the slit, machine stitch all the way around it with matching thread, close to the line. See the stitching around the mouth in the photo above? This will prevent the mouth from stretching from repeated use. You can also used this method with the slit you need to cut in the back for turning. It makes things look neater with less stretching. The PDFÂ pattern has also been updated with this change (and can be found here).
Well, there you have it. Just a small thing. Have a wonderful Thanksgiving holiday all you United States citizens, wherever you may be.


Hi! I'm glad to hear that you feel better! Thanks for the improvement in your Tooth Pillow pattern!
Happy Thanksgiving to you – even if we don't celebrate it here in Germany I'm sending a happy time over the Atlantic!
That pillow is just adorable. Cutest one I have ever seen for a tooth pillow. Happy Thanksgiving!
Glad you are feeling better! I know that as a mom of four, there is nothing worse than not being able to move without hurting. The pillow is adorable, I have had the pattern printed out for at least six months, I will get it done before the last one loses all his teeth (I hope)
Thanks for the update! I've been meaning to make more of these for gifts but forgot all about it until I saw your post.
Glad to hear you are on the mend! Good idea for the pillow too. I can't wait to make them for my kids! I had something similar growing up and loved it. I am glad, however, that I have plenty of time (a couple of years) to get the done. 🙂
So cute! I love the little face.
Welcome back. Thanks for the update on your gorgeous tooth pillow – definitely a project I want to try.
I hope your feel soon better!Such a cute tooth Pillow!
Nice improvement. My daughter asked me the other day when her teeth would start coming out, and it got me thinking about this project and how much I am looking forward to it!
It's like kismet, that I found this post. I have a 5 year old snaggletooth of a sweetie, who should be losing teeth at any moment, and who was a ballerina butterfly fairy for at least 2 of her last 5 Halloweens. This is PERFECT. Now do something with a horse, because that's what her little sister loves.
davinie, don't you just love it when things fall in place? glad I could help. can't help with the horse thing though. 🙂
This is the perfect gift for a little girl who has it all! She is Country and Western, so I'm going to make a Lil Bandana around her waist., use light felt with brown cow spots and hang with rope braid. You definitely got my creative juices rolling. Thanks so much.
Where do I find the pattern?
Hi, Cynthia, there's a link to the pattern up there under the tooth closeup photo and there's also a link under my Tutorials tab.
Hi! The pdf link is broken. Can you tell me where else I might find it? Thanks!
Hi, Natalie! Thanks for letting me know about the link. You can find the pattern here:
https://mmmcrafts.blogspot.com/2009/02/tooth-pillow-revisited.html