Mr Wormy Apple Gift Tag Tutorial

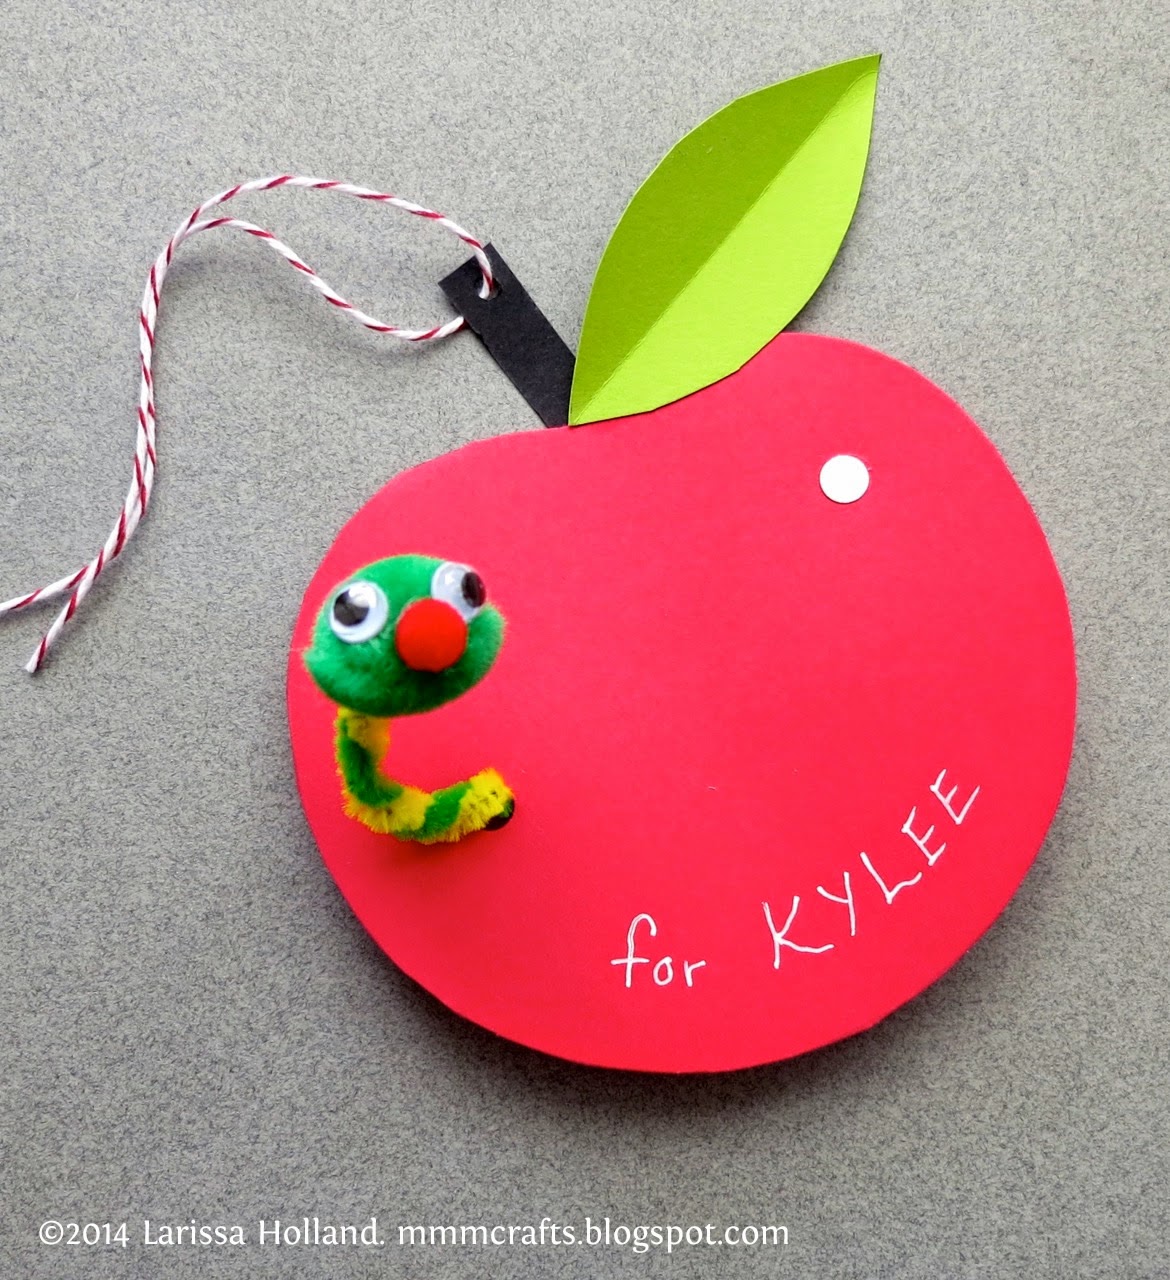
Cute gift tags are fun. Y’all know I love making gift tags that double as cards (like this and this). I’m all about two birds with one stone. This is my latest iteration for kids’ gifts, and includes a bonus — a cute, poseable toy worm to play with after the party is over. Here’s a how-to for you.
You’ll need:
- This template
- Letter sized 8.5 x 11 in. red card stock
- scraps of green, black and white card stock
- paper glue and fabric glue (like Fabri-Tac®)
- a toothpick
- a standard 1/4 in. hole punch and a 1/8 in. hole punch
- scissors
- bone folder or butter knife for scoring
- two pipe cleaners, one green and one yellow
- one small green pom and one red mini-pom
- two 1/4 in. googly eyes
- piece o’ tape
- gel pen
- string for tying tag (I like pretty baker’s twine)
1) Print the template at actual size (no scaling) on your red card stock. You’ll have enough to make two tags. Cut out one rectangle and set the other aside for later. Cut out the leaf template and set aside.
2) Use your bone folder or butter knife to score the fold on the apple card. Fold the rectangle in half and cut the apple shape out, being sure to leave the connected parts uncut so your card will open and close. Then flip it inside out so any stray toner marks will be on the inside.
3) Use the leaf template to trace a leaf on green card stock. Use the bone folder to score a line down the middle. Cut out the leaf and erase any stray pencil marks. Fold it along the score.
4) Use the standard 1/4 in. hole punch to make a nice worm hole in the top apple layer only, as shown.
5) Cut out a small rectangle from black card stock to use as a stem. Glue the stem at a jaunty angle to the back of the apple.
6) Dot a small amount of glue to the bottom corner edge of the leaf and place it as shown.
7) Use the standard 1/4 in. hold punch to make one circle of white for a nice shiny highlight. Use the toothpick to dot on some paper glue and stick it toward the top right as shown.
8) Now for Mr Wormy. Cut a 5 inch piece from both pipe cleaners. Set the extra pieces aside to make another Mr Wormy later. Twist the pipe cleaners together to create a stripey body. On the tail end, fold over the very ends and crimp firmly so they will stay wound together and there will be no sharp wires poking out.
9) Add a nice dot of fabric glue to the green pom and stick the sharp ends of the worm neck inside the pom through the glue. Hold in place for a minute so it will set.
10) Use a toothpick to add dots of fabric glue to the other side of the pom so you can attach the red mini-pom nose and the two googly eyes. I like to say googly eyes. Googly eyes!
11) Now’s the time to write a name on the outside of the card and a greeting on the inside. I like to use a white gel pen. It looks nice.
12) Punch a 1/8 in. hole in the top of the stem for the baker’s twine or string.
13) Feed the tail end of Mr Wormy through the worm hole until you have just the right amount showing outside the card. Have fun bending his head into a charming angle. Tape the end of the worm to the inside of the card so he stays in place until the gift giving is over.
That’s it! All that’s left is to tie your awesome, handmade, googly-eyed Mr Wormy gift tag to your present and congratulate yourself on saving a trip to the card store. (high five self)


Very kind and nice your posts from Brasil. Brasil is some mess but its not only carnaval. It is a very beautiful country. Your posts is a beautiful too, its a real marketing about Brasil. Amélia
Ola, Mendonca, you are right, it's the most beautiful country I've seen yet. So much more to it than Carnaval and futbol.